Sorry for the planner talk two posts in a row. It's October, which is close enough to 2025 for it to be planner season and I'm excited.
I'm sharing more from my 2024 planner although I'm going to embarrass myself because my work is clearly amateurish. I'm learning and I hope to improve as I do this a few more times.
Because I enjoy vellum images, I decided to add some to the blank pages in my soon-to-be-expired planner. I tried pasting them down, taping in tip-ins on the inner edge, the outer edge, and the bottom edge, and it was a mixed bag.
Some of it kind of turned out okay. Most of it didn't end up looking very good at all. And I have more vellum to try out as I desperately try to fill up pages.
The crazy thing is that a lot of people who use this planner create daily pages on these blank pages (368 of them, perfect for a year's worth) and I never thought of it. Argh!
Next year, I will use the blank pages to journal one page a day and won't have this problem.
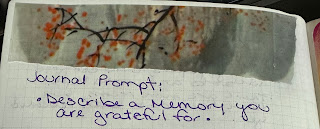
I started with a tip-in. For those unfamiliar, that means the page is only attached on one side and it opens out to show the page below. I fastened this one to the spine side. And somehow, I cut the vellum too short for the book. I had it laid right over the page while I cut with the scissors, so I don't know how it happened, but otherwise it pasted in well and works as expected. I'm giving myself a B+.
The vellum on these two pages is pasted down on the left, and a tip-in on the right. This one is pasted down at the bottom edge.
This one? Well, the left page has very little room left to write and it's narrow at the top before widening out. The tip-in on the right is a mess. I ended up just folding the vellum at the tape line in order to write. This one is probably a D.
I have eight more pages of vellum design printed. If I can't figure it out in that number, I might have to give it up.


